Articles
Welcome to the Blue Giant knowledge database – your go-to resource for articles, insights, and industry updates in the loading dock and material handling industries. Whether you're looking for product guides, tips for optimizing your operations, or applying industry best practices, you'll find valuable content to help you optimize your operations and stay ahead of the curve.

10 Considerations When Designing a Safe and Efficient Loading Dock
The Material Transfer Zone (MTZ) is often one of the busiest areas of any facility with a loading dock installed. Because it acts as the bridge between the trailer and warehouse, the MTZ can also be a dangerous place where safety needs to be the number one consideration.

A Comprehensive Guide to Lift Table Parts and Lift Table Accessories
Lift tables are an essential component in all sectors of the material handling industry. Customizing your lift table parts and your lift table accessories to optimize your application is an excellent way to enhance the functionality of your operation.

A Comprehensive Guide to Loading Dock Solutions
In today's fast-paced environment, optimizing the efficiency of your loading dock is paramount. Whether you're a seasoned logistics professional or just diving into the world of warehouse management, this guide aims to be your go-to resource for loading dock solutions to help optimize worker safety and efficiency.

Accident Prone: Preventing Mishaps on the Dock
Accidents on the loading dock can lead to huge expenses. In addition to the direct costs of medical expenses, wage indemnity and claims administration fees, accidents entail many indirect costs.

Best Ergonomic Equipment for Your Warehouse
Technology works best when it enhances the human experience, rather than replacing or distracting from it. The same can be said of ergonomic warehouse equipment.

Blue Giant 60th Anniversary
Blue Giant Equipment Corporation is pleased to celebrate its 60th anniversary of serving the needs of customers around the world in 2023. The company is the premier provider of safe, effective, and innovative loading docks and material handling equipment solutions.

Blue Giant Equipment Acquires Cormac Industrial
Blue Giant Equipment Corporation (“Blue Giant”), a leader in the development, manufacturing, and distribution of loading dock safety systems, and ergonomic lifting solutions has acquired controlling interest of prominent ergonomic lift assist solutions provider, Comacind, S. De R.L. De C.V. (“CormacIndustrial”).

Blue Giant: What is a Scissor Lift Table?
While many variations exist in facilities across the globe, all scissor lift tables perform the same basic function. Essentially, a scissor lift table employs a scissor mechanism to help lift goods and materials.

Blue Giant’s Innovative Ergonomic Solutions
What comes to mind when you hear the word “ergonomics”? For some of us, ergonomics may be associated with common workplace injuries.
.jpg?width=300&height=200&ext=.jpg)
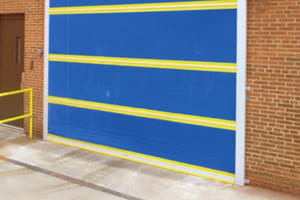
Bug Screen Doors
Blue Giant Bug Screen Doors create a comfortable work environment by allowing fresh air to enter the building while denying entry to insects, rodents, airborne dirt and debris, and even trespassers.
Different Types of Hydraulic Lift Tables
When purchasing a hydraulic lift table for your business, there are many factors to consider. Relevant factors include type of product and manufacturing space, weight capacity, repetitive tasks, proper ergonomic support for frontline workers, and projected frequency of use.

Energy-Saving Solutions for Winter Loading Dock Operations
Dock safety and energy-saving products help customers reduce heat loss, improve indoor air quality, and boost operational safety and efficiency throughout the winter season.

How Does a Hydraulic Lift Cart Work?
A hydraulic lift cart is the perfect material handling solution for any manufacturing or distributing facility. Like all hydraulic lifts, the lift cart is expertly designed to enhance workplace safety and mobility by limiting the need for frontline workers to bend, lift, or carry substantial loads.
.jpg?width=300&height=200&ext=.jpg)
How to Build and Design an Ergonomic Warehouse
Have you ever wondered how to build and design an ergonomic warehouse? Whether you’re starting from scratch or starting over, this task can feel overwhelming.

HVLS Fans for Enhanced Comfort and Energy Savings
Blue Giant received an inquiry from a distribution center experiencing temperature control issues. Hot summers produced excessive internal heat gain and a poorly insulated roof allowed for the escape of the much needed heat during the winter.

Ergonomic Solutions for Risk Factors in a Warehouse
In a bustling manufacturing or warehouse facility, where efficiency and productivity are paramount, the health and well-being of workers can sometimes take a backseat.

How Do You Install Folding Security Gates?
Looking for an innovative manual solution to keep safety levels high and protect your warehouse? Folding security gates control safe access to loading bay doors and other restricted areas, safeguarding your property against possible theft or trespassing.
.jpg?width=300&height=200&ext=.jpg)
How to Choose the Best Lift Table Solution for Your Application
When it comes to choosing the perfect lift table for your application, the sheer number of options available can make the buying process feel overwhelming.

How To Create A Safe Loading Dock
It is never too late to improve your loading dock safety practices to help ensure building integrity, employee safety and product safety. Here are some solutions that can help increase safety at your loading dock/bay.
.jpg?width=300&height=200&ext=.jpg)
How to Improve Workplace Safety
Workplace safety is a top priority for any manufacturing company. Implementing effective safety measures not only ensures the well-being of employees, but also promotes productivity and operational efficiency.

Lift Table Features: What Is a Lift Table Mechanism?
For those who work in the manufacturing industry, a lift table can be a virtual lifesaver, especially when it comes to a busy environment. With all the lifting, bending, pulling, pushing, and standing required of frontline workers, it is little wonder that assistive technologies are in such high demand.

Loading Dock Lighting Requirements
The loading dock area of any manufacturing facility is sure to be buzzing with activity. To maintain a safe, cohesive working environment for all, careful consideration must be given to logistical elements such as adequate lighting.

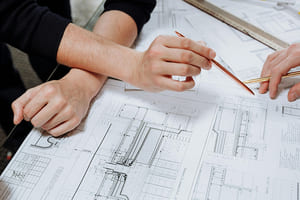
Mastering the Loading Dock Installation Process: From Assessment to Final Inspection
When it comes to loading dock installation, completing each individual step correctly is the key to success. In this comprehensive guide, we cover everything you need to know about the entire journey of a loading dock installation, from the initial assessment to the crucial final inspection.
.jpg?width=300&height=200&ext=.jpg)
Maximizing Efficiency and Safety with Loading Dock Bumpers
Ensuring the smooth and safe operation of your loading dock is a critical aspect of warehouse and logistics management. There is a fundamental yet often overlooked component of this bustling area – loading dock bumpers.
-(1).png?width=300&height=200&ext=.png)
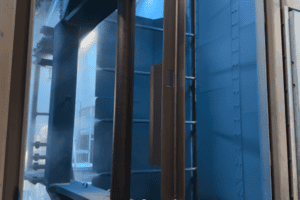
Powder Coating in the Loading Dock and Material Handling Industries
Powder coating has emerged as an essential finishing process in manufacturing these products, offering superior protection, aesthetics, and cost-effectiveness compared to traditional methods.

Should You Buy a Used Lift Table?
Are you in the market for a lift table to enhance your material handling process? Deciding whether to buy a new or used lift table is a tough call.

The Basics of Loading Dock Bumpers
Choosing the right loading dock bumper can help you avoid building, loading dock and vehicle damage, expensive repairs, and unnecessary downtime. Here's how to choose the ideal solution for your facility.

The History of Blue Giant
Blue Giant is proud to have been a leader in the development, distribution and manufacturing of loading dock systems and material handling equipment since setting up shop in 1963.

The Ultimate Cheat Sheet to Scissor Lifts
A scissor lift is a platform designed to elevate and move significant loads. They can travel various vertical heights or can be lowered to ground level.

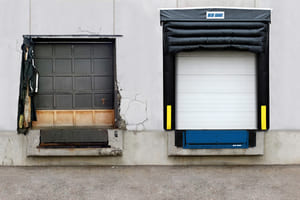
Top 3 Benefits of Loading Dock Shelters
The loading dock area at any warehouse is a virtual hive of activity. Whether goods are being loaded or unloaded for transfer, there is always a sense of urgency to each task.

Understanding Ergonomics in Your Warehouse
What comes to mind when you hear the word “ergonomics”? For some of us, ergonomics may be associated with common workplace injuries.

Understanding LEED: How Dock Equipment Supports Green Building Certification
As sustainability becomes a top priority for building owners and facility managers, many are turning to LEED certification as a trusted benchmark for environmental performance. But did you know that loading dock equipment can contribute to LEED credits, and that you, as a dealer, can help guide your customers toward cost-effective, greener choices? Here’s what you need to know about the program.

What Are the Top 5 Aspects of Ergonomics in a Plant?
Any time that manual labor and machinery are part of the job, workplace health and safety take on a whole new level of importance.

What Is a Hydraulic Lift Table?
Are you looking for powerful assistive technology to enhance warehouse production? A hydraulic lift table can help to simplify tasks and provide ergonomic support for frontline workers in a range of diverse industries.
.jpg?width=300&height=200&ext=.jpg)
What Is a Manual Lift Table?
In the dynamic landscape of industrial manufacturing and warehouse operations, the quest for increased efficiency and productivity is a constant pursuit.

What Is a Pallet Lift Table?
In order to provide frontline workers with proper ergonomic support and eliminate the need for repetitive movements, pallet lift tables are frequently used in various types of facilities around the world.

What Is a Pallet Positioner and Why Do You Need One?
In busy manufacturing and warehouse facilities, pallet positioners are key to increasing speed and efficiency. By providing optimal ergonomic support, a pallet positioner is an assistive device created to enhance worker safety and productivity.

What Is a Pneumatic Lift Table?
Every busy facility can benefit from assistive technology to help lighten the load. Lift tables are ergonomically designed to assist frontline workers in the manufacturing process.

What Is an Electric Lift Table?
Are you looking for a more efficient and precision version of your manual lift table? Electric lift tables are renowned within the material handling industry for both of these qualities.

What Is the Difference Between a Mechanical & Hydraulic Dock Leveler?
A dock leveler acts as a structure to bridge the gap between the trailer bed and the facility floor. By bridging the gap, a dock leveler helps to improve the loading and unloading process and create a safe loading dock.

Why Loading Dock Door Seals are a Must Have
Loading dock door seals and shelters are designed to improve energy conservation, help preserve internal temperatures, and protect products from outdoor contaminants.

Why Safety Is the Smartest Investment
Read on to explore how smart safety upgrades can drive performance, limit liability, and deliver lasting value across the board.
Ready to Optimize Your Operations?
Blue Giant’s industry-leading solutions are designed to meet your evolving needs. Whether you need standard equipment or customized solutions, our expertise and innovation ensure your operations run smoothly and efficiently.
Request a Consultation